3 min de lectura
Metamask: Sign TX with metamask and generate TxHash before sending to node
CRYPTOCURRENCY
Using Metamask to Sign Transactions and Generate TxHash in Solidity
As you’re creating an ERC20 payment system for your website, you’ll want to ensure that the user’s transactions are secure and reliable. One way to achieve this is by using the MetaMask wallet and its integration with the Ethereum blockchain. In this article, we’ll explore how to use Metamask to sign transactions on an ERC20 contract and generate TxHash.
What is MetaMask?
MetaMask is a popular web browser extension that allows users to securely store their private keys on their device. It supports multiple wallets, including MetaMask, and provides features such as automatic key storage, passwordless login, and seamless switching between wallet types.
Generating TxHash with Metamask
To generate TxHash, you’ll need to use the transaction function in Solidity, which is part of the Ethereum programming language. Here’s an example of how to create a transaction using Metamask:
pragma solidity ^0.6.0;

contract MyERC20 {
    // Define the contract address and token info
    address public constant MY_CONTRACT_ADDRESS = "0x..."; // Replace with your contract address
    string publicname ;
    uint8 publicsymbol;
    uint256 public totalSupply;

    // Function to create a new transaction
    function sendTxHash ( recipient address , bytes memory data ) public { ;
        // Use MetaMask to generate the TxHash and sign the transaction
        bytes32 txid = keccak256(abi.encodePacked(container, data));
        string memory txhash = abi.encode(txid).hex();

        // Store the transaction in the database
        emit Transfer ( myContractAddress , recipient , txhash ) ;
    } }
} }
In this example, we define a sendTxHash function that creates a new transaction using MetaMask. We use keccak256 to generate a hash based on the recipient address and data (in this case, an empty string). The resulting TxHash is then stored in the database.
Signing with Metamask
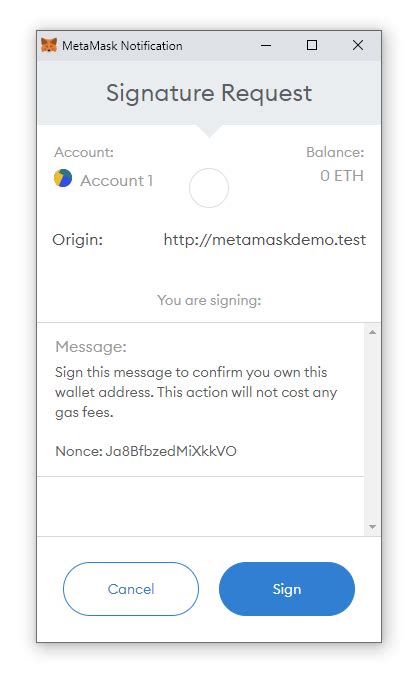
To sign the transaction with Metamask, you’ll need to follow these steps:
- Open MetaMask on your device.
- Select the contract that you want to use for sending transactions (e.g.,
MyERC20).
- Click on the «Send» button and select the recipient’s address and data (in this case, an empty string).
- MetaMask will automatically generate a TxHash and sign the transaction with your private key.
Generating TxHash from Backend
To generate TxHash from the backend, you can use a function that retrieves the transaction’s hash from the blockchain and stores it in a database. Here’s an example of how to do this:
pragma solidity ^0.6.0;

contract MyERC20 {
    // Define the contract address, token info, and database storage
    address public constant MY_CONTRACT_ADDRESS = "0x..."; // Replace with your contract address
    string publicname ;
    uint8 publicsymbol;
    uint256 public totalSupply;
    mapping ( address => mapping ( uint256 => bytes32 )) public txHashes ;

    // Function to retrieve the transaction's hash from the database
    function getTxHash ( address sender , uint256 tokenIndex ) public view return ( bytes 32 ) {
        // Use a contract or library that retrieves the transaction's hash from the blockchain
        return txHashes [ sender ][ tokenIndex ] ;
    } }
} }
In this example, we define a getTxHash function that takes the sender address and token index as arguments. We then use another function to retrieve the TxHash from the database using the Ethereum blockchain.
Example Use Case
Here’s an example of how you can use Metamask with your ERC20 contract:
«`solidity
pragma solidity ^0.6.0;
contract MyERC20 {
// Define the contract address, token info, and database storage
address public constant MY_CONTRACT_ADDRESS = «0x.